Really happy to share with you a new redesign project today!
I used a 5.75″ X 10.75″ Tim Holtz Configurations set as the base for the project. More about of some of the products I used to create the redesign is included in this post.
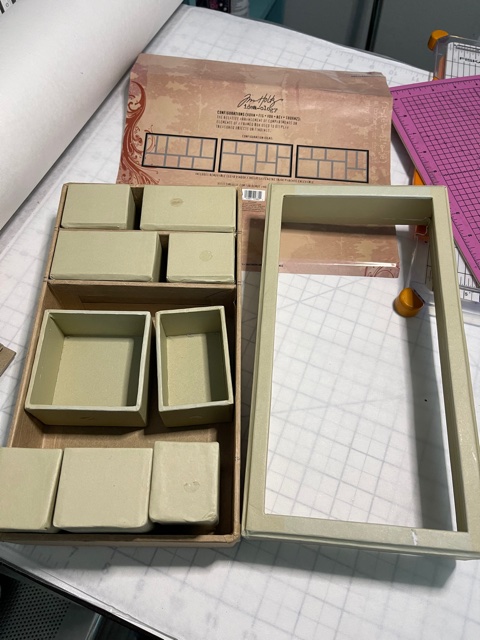
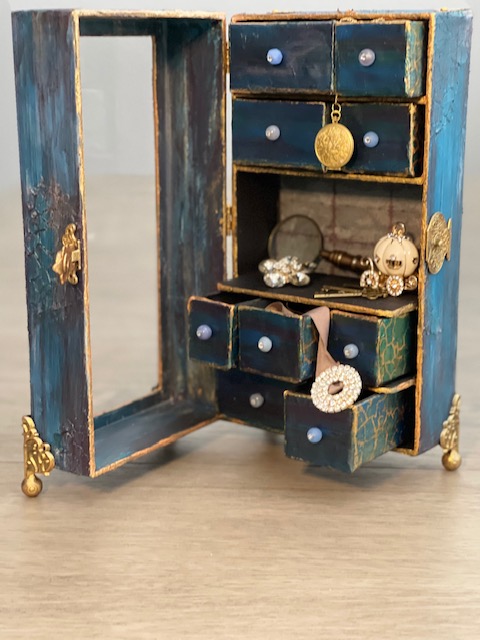
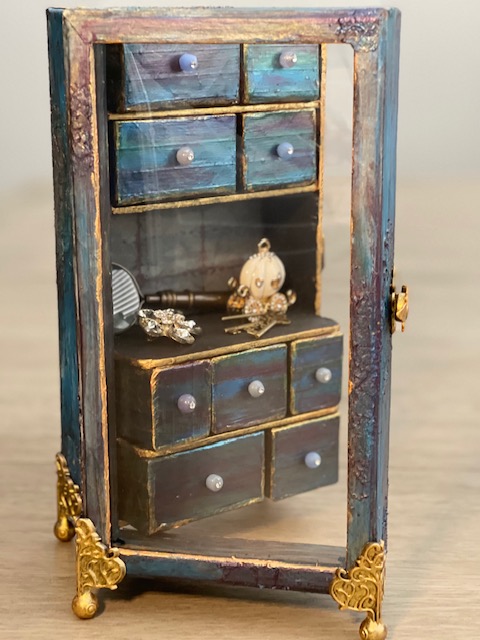
I wanted the back and front of the configuration frame to be the same depth. In order to achieve this I rebuilt the original tray from the configurations set to make the “lid”.
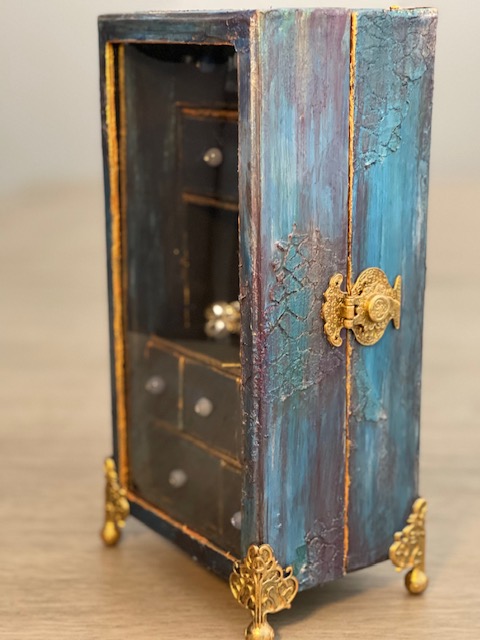
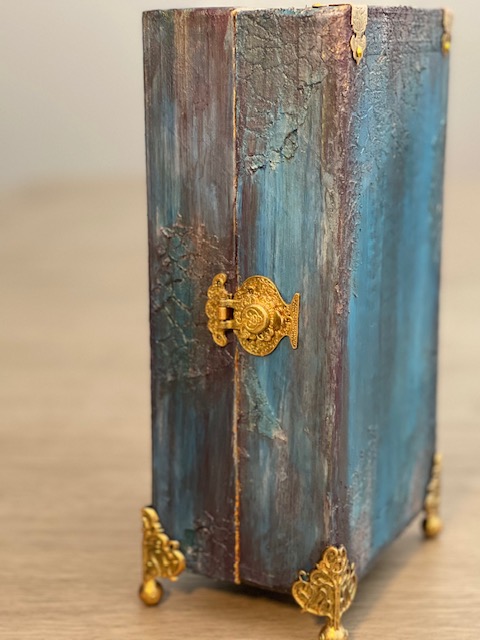
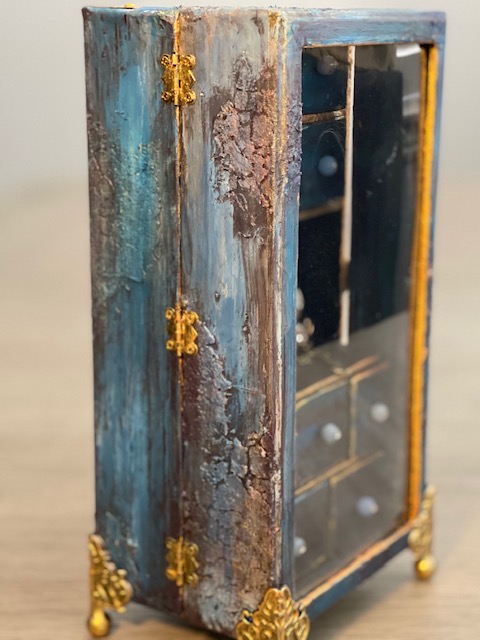
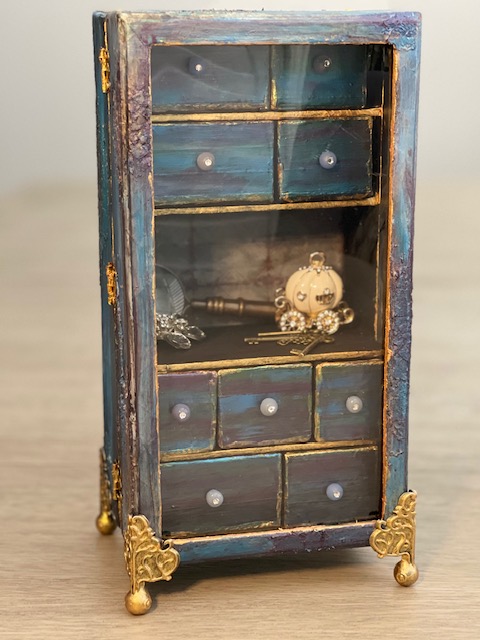
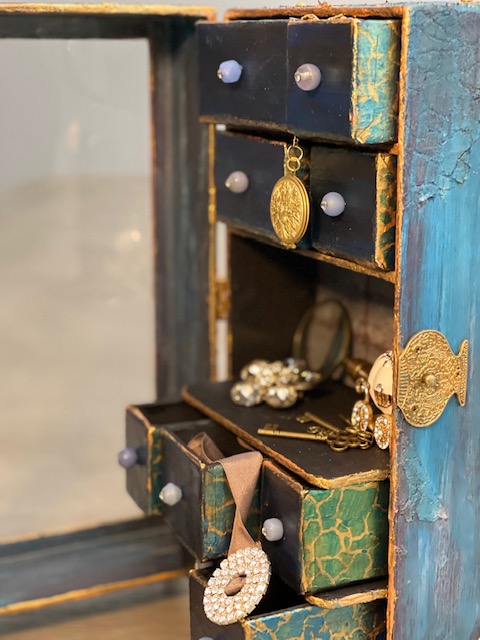
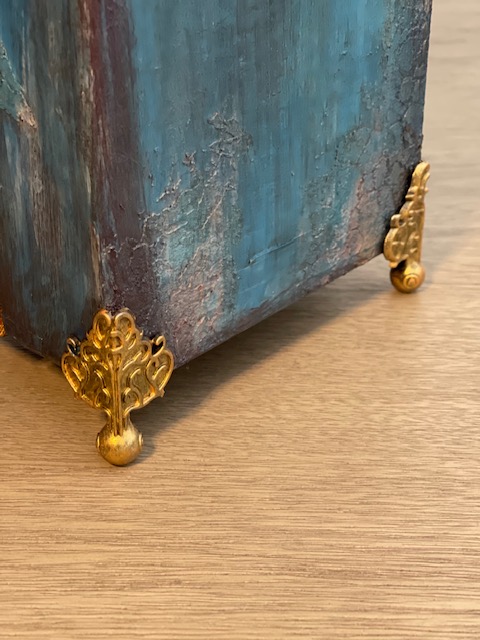
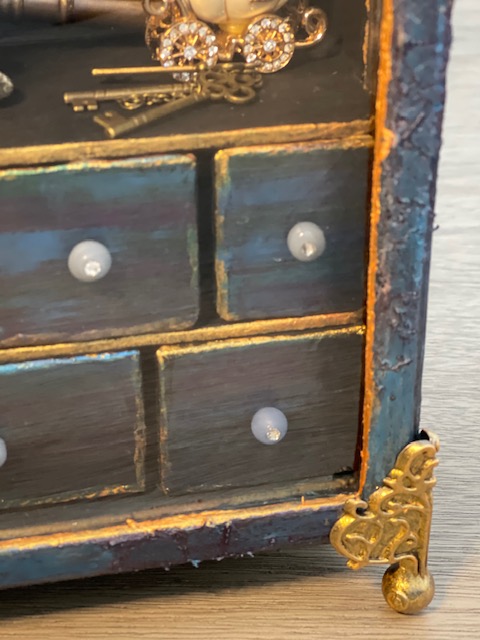
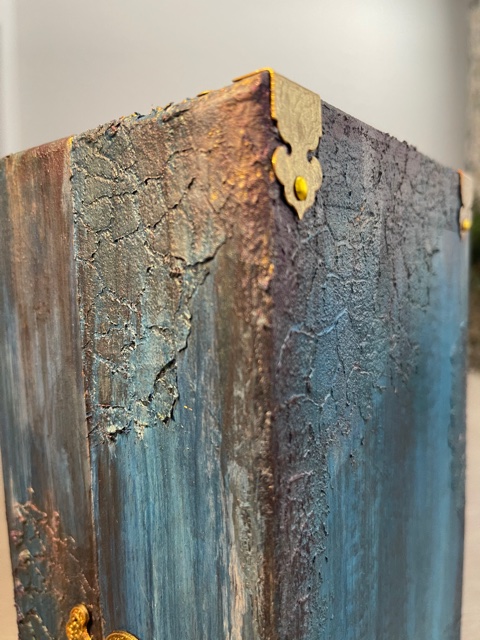
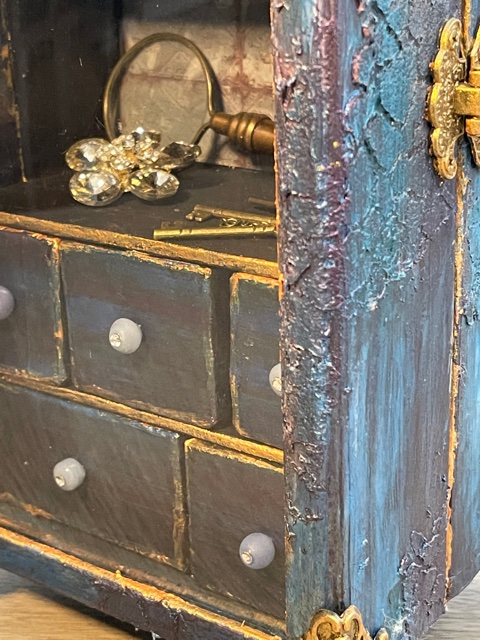
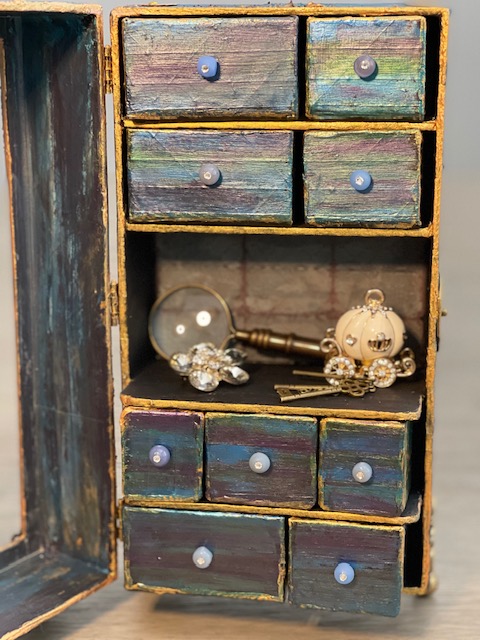
I used hardware pieces from my mixed media collection and Tim Holtz Idea-ology Foundations Box Feet. I painted all of the metal hardware in Prima Marketing / Finnabair Art Alchemy Sparks Paint in Ginger Magic. I also used the Sparks paint for detailing the edges of the drawers and box.
To give each drawer a little pizzazz, I used a Stampers Anonymous Tim Holtz Collection Stencil “Crackle” on the sides of the drawers and outsides of the box. I first put a layer of Sparks paint, then used Prima Marketing / Finnabair Art Alchemy Metallique Acrylic Paint in Deep Waters and Emerald Green, alternating between the colors on each drawer. To finish off the drawers, I used a mixed selection of ceramic and glass beads from my jewelry making supplies. I attached the beads using eye pins and Glossy Accents. For more just a little more pizzazz and bling, I added Swarovski crystal gems to cover the bead holes and eye pin heads.
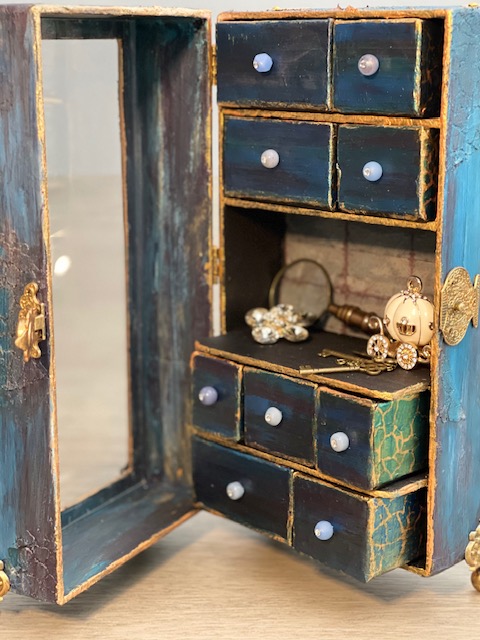
I used my technique for creating chipboard projects (see my YouTube channel videos for how-to), I then applied a base coat to the entire piece, including the drawers, in Prima Marketing Inc / Finnabair Art Basics Heavy Black Gesso. This gave me the full cover base I needed to apply the color to the project. I used the Crackle stencil and some Liquitex Blended Fibers to create the texture on the box.
Once everything dry, I gave it 24 hours before I starting painting, I used a combination of Craftsmart Multi-Surface Premium Chalky Acrylic Paint in French Teal, Art-C Ultra Chalk Soft Matte Paint in Turquoise Blue and Art-C Metallic Paint in Eggplant, and Art Alchemy Metallique paint in Emerald Green and Deep Waters. I used Sparks paint for bits of highlighting over the entire box base. For the drawer fronts, I used a painting technique I learned many years ago. I floated three of the paint colors on my paint brush, then brushed over the drawer fronts giving them a blended paint look. The last step was spraying the entire project with Krylon Matte UV-Resistant Clear Acrylic Coating. I left the clear window that came with the Configurations box off to avoid getting overspray on it from the acrylic coating. I later attached the clear window using double-sided tape.

FINISHING TOUCHES:
For staging and accessorizing the project, I used pieces from my mixed media collection (magnifying glass and keys). I also used rhinestone pieces from Mon Ami Gabby (flower pin, Cinderella Coach, round buckle), and a Tim Holtz Assemblage Locket. The inside back panel was created by using a piece from 7gypies Architextures Junque Attic Collection. Pearl accents are from Tim Holtz Idea-ology Baubles Collection.
I hope to bring you a new design project soon!
Thank you for following this blog, and for following me on social media.