So, this has been my mantra for almost a year or more. I took my que from the phenomenal Oprah Winfrey when she once said, “when you don’t know what to do, get still until you do know.
I’ve taken time off from DesignWishesbyPamela to focus more on family and myself. The pandemic and my husband’s health scare brought into focus the need to be even more centered on self and family.
That’s not to say creating and designing, posting YouTube content and on social media are no longer important, it just means I needed to re-center my life. And, that’s where Oprah’s quote spoke to me.
I hope to back on YouTube again or launch a new adventure, with new designs and creativity to inspire you.
Thank you for following and if you haven’t already subscribed to my blog or YouTube channel, please do so that you won’t miss my posts when I am back.
Just letting you know that I am still crafting. I know it has been some time since my last post.
All is well here and I hope the same is true for you!
I’ve been busy, mostly with family, but also creating and designing new craft projects for you to be inspired by.
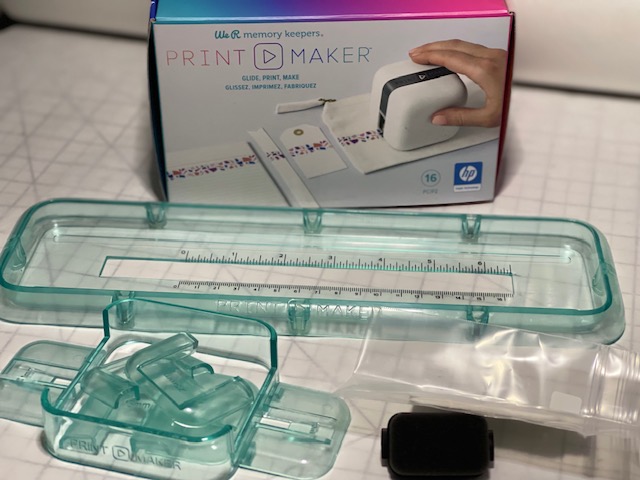
One thing that has been keeping me busy is playing with the WeRMemory Keepers “PrintMaker” I just purchased. Have you seen it? Did you purchase one? How do you like the PrintMaker? Please leave a comment. I would love to know your review of the PrintMaker.
I am getting familiar with the PrintMaker and trying out the features. I have come up with a few projects using the PrintMaker and I hope to share them with you here on my blog and on my YouTube channel.
I also recently purchased a nearly new Curio. I got it second-hand. Silhouette America makes the Curio.
I’ve been intrigued by all the materials the Curio can cut. Always thought I would eventually purchase a Curio, and luckily, my sister Mary found the Curio I purchased on an online auction website.
I think it will be a useful tool for my mixed media designing. Do you have a Curio? How do you use it? Leave a comment. I would love to be inspired.
I’ll be posting design projects once I get more familiar with the Curio.
Until then, I hope you all are enjoying your summer, and are finding time to craft.
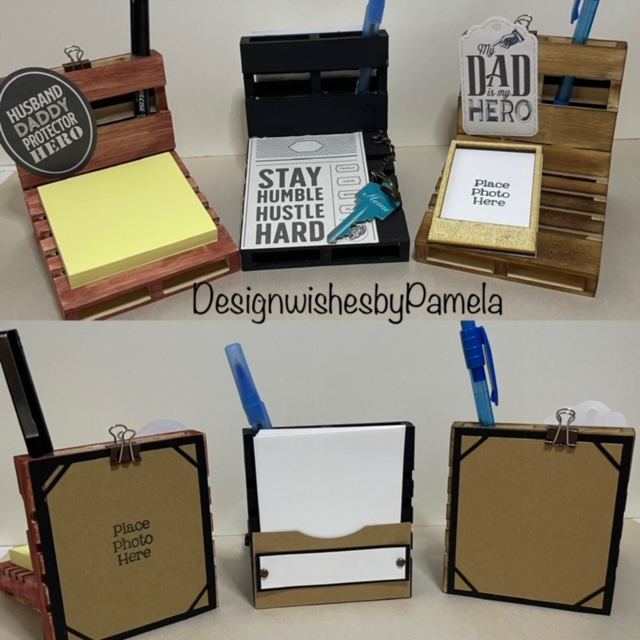
I designed and created this desk caddy using mini wood palettes I purchased from my local Dollar Tree Store!
Check out my YouTube video on how I put together these cute little caddies. I give you the measurements and supplies I used to create each of these caddies. The pocket feature will fit a gift card too!
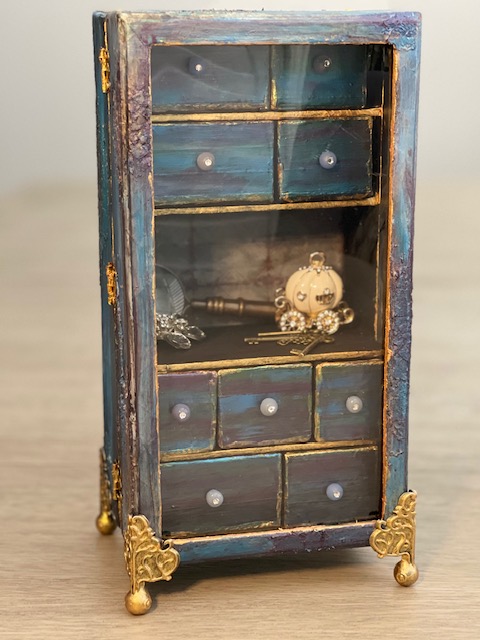
Really happy to share with you a new redesign project today!
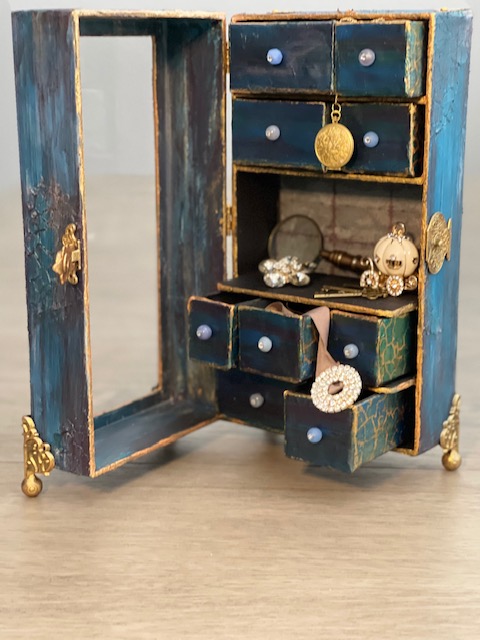
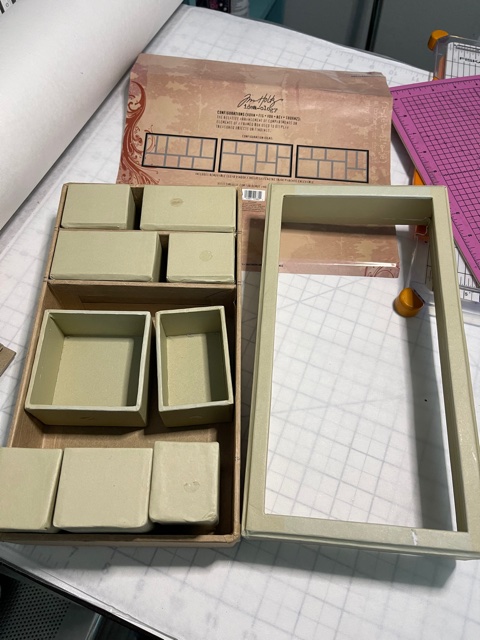
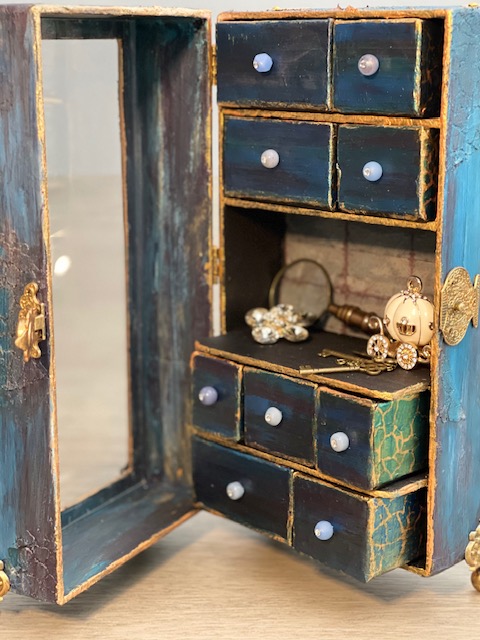
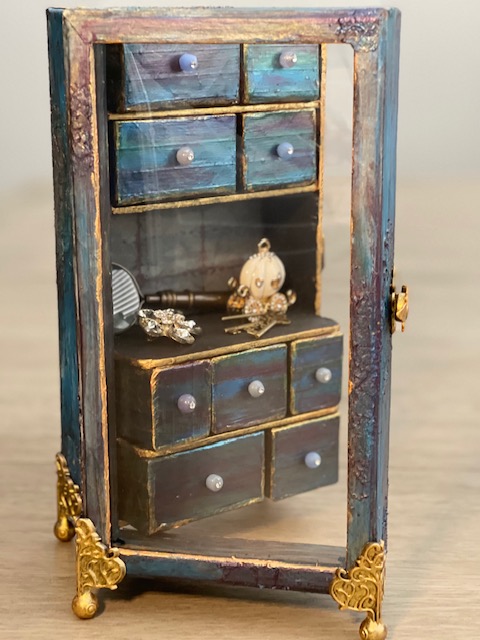
I used a 5.75″ X 10.75″ Tim Holtz Configurations set as the base for the project. More about of some of the products I used to create the redesign is included in this post.
I wanted the back and front of the configuration frame to be the same depth. In order to achieve this I rebuilt the original tray from the configurations set to make the “lid”.
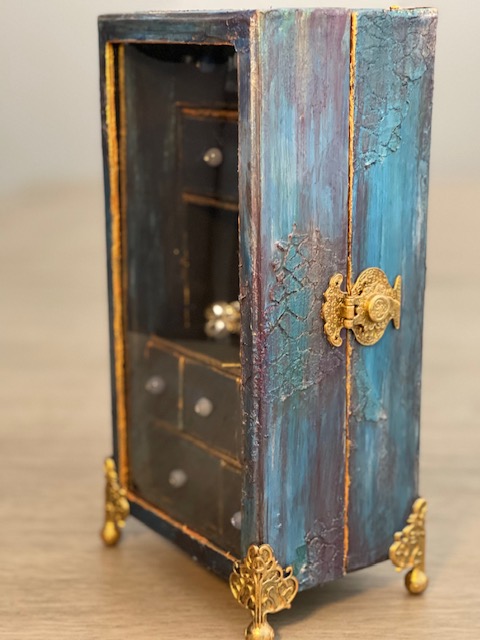
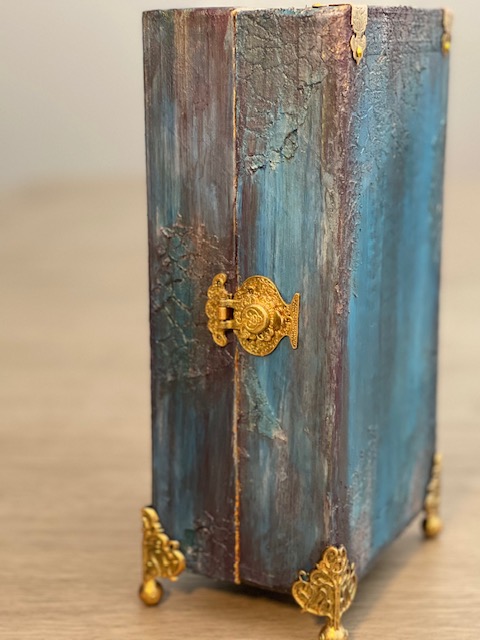
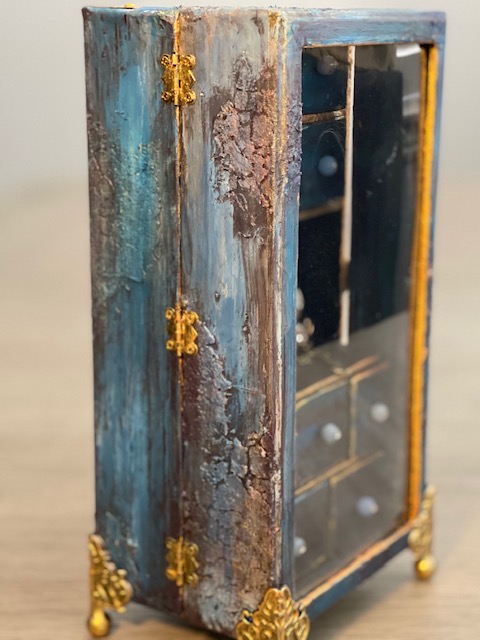
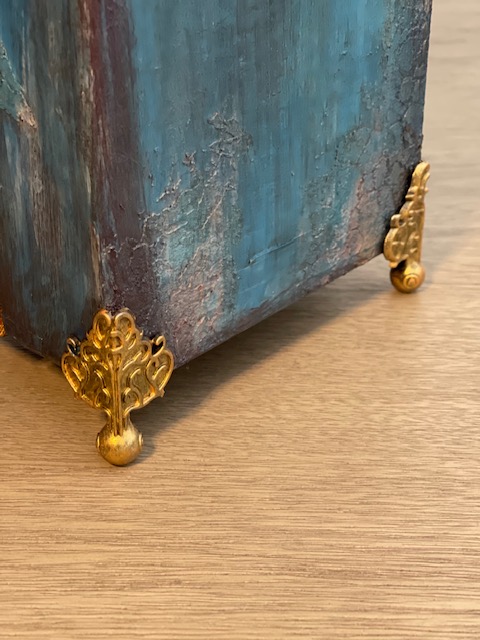
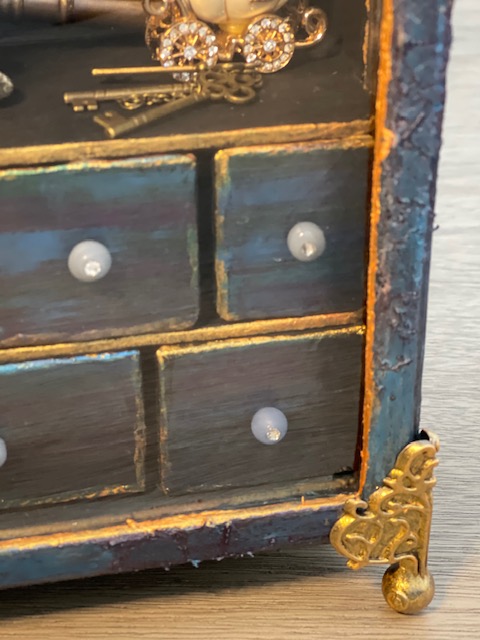
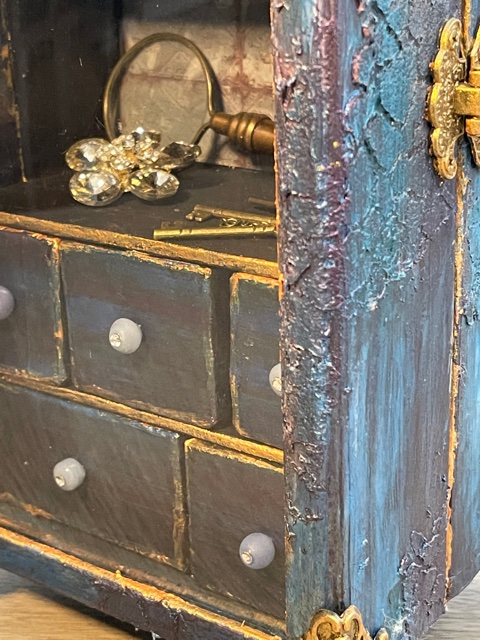
I used hardware pieces from my mixed media collection and Tim Holtz Idea-ology Foundations Box Feet. I painted all of the metal hardware in Prima Marketing / Finnabair Art Alchemy Sparks Paint in Ginger Magic. I also used the Sparks paint for detailing the edges of the drawers and box.
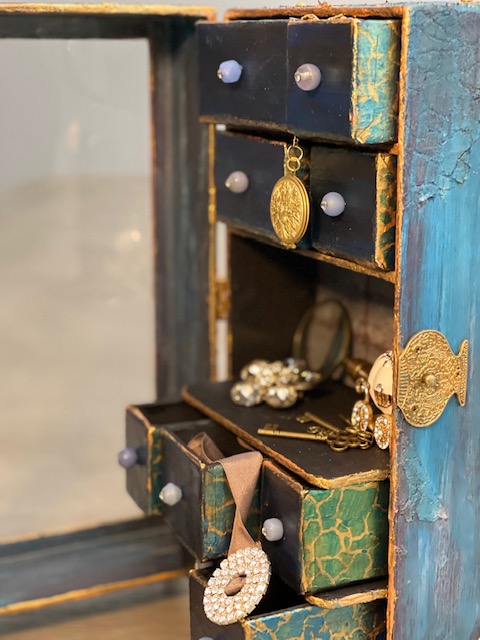
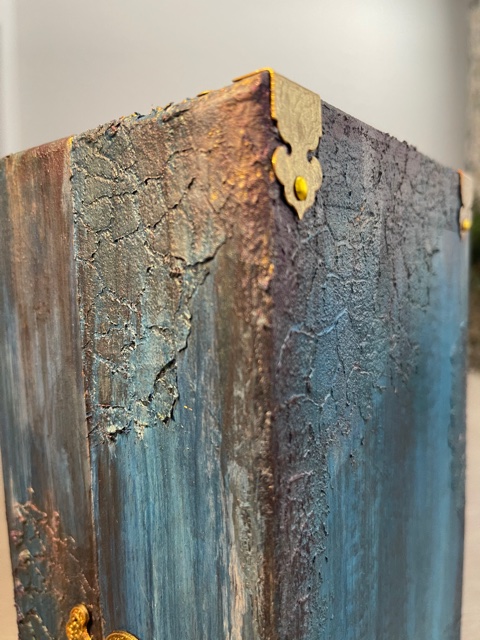
To give each drawer a little pizzazz, I used a Stampers Anonymous Tim Holtz Collection Stencil “Crackle” on the sides of the drawers and outsides of the box. I first put a layer of Sparks paint, then used Prima Marketing / Finnabair Art Alchemy Metallique Acrylic Paint in Deep Waters and Emerald Green, alternating between the colors on each drawer. To finish off the drawers, I used a mixed selection of ceramic and glass beads from my jewelry making supplies. I attached the beads using eye pins and Glossy Accents. For more just a little more pizzazz and bling, I added Swarovski crystal gems to cover the bead holes and eye pin heads.
I used my technique for creating chipboard projects (see my YouTube channel videos for how-to), I then applied a base coat to the entire piece, including the drawers, in Prima Marketing Inc / Finnabair Art Basics Heavy Black Gesso. This gave me the full cover base I needed to apply the color to the project. I used the Crackle stencil and some Liquitex Blended Fibers to create the texture on the box.
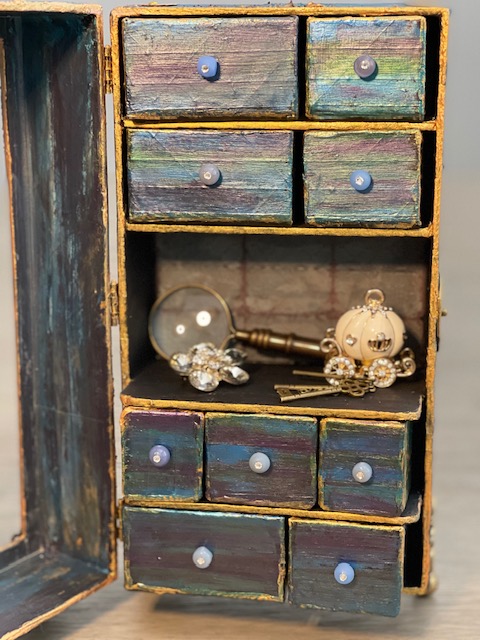
Once everything dry, I gave it 24 hours before I starting painting, I used a combination of Craftsmart Multi-Surface Premium Chalky Acrylic Paint in French Teal, Art-C Ultra Chalk Soft Matte Paint in Turquoise Blue and Art-C Metallic Paint in Eggplant, and Art Alchemy Metallique paint in Emerald Green and Deep Waters. I used Sparks paint for bits of highlighting over the entire box base. For the drawer fronts, I used a painting technique I learned many years ago. I floated three of the paint colors on my paint brush, then brushed over the drawer fronts giving them a blended paint look. The last step was spraying the entire project with Krylon Matte UV-Resistant Clear Acrylic Coating. I left the clear window that came with the Configurations box off to avoid getting overspray on it from the acrylic coating. I later attached the clear window using double-sided tape.
FINISHING TOUCHES:
For staging and accessorizing the project, I used pieces from my mixed media collection (magnifying glass and keys). I also used rhinestone pieces from Mon Ami Gabby (flower pin, Cinderella Coach, round buckle), and a Tim Holtz Assemblage Locket. The inside back panel was created by using a piece from 7gypies Architextures Junque Attic Collection. Pearl accents are from Tim Holtz Idea-ology Baubles Collection.
I hope to bring you a new design project soon!
Thank you for following this blog, and for following me on social media.
Thanks to everyone who entered the giveway! I am so thankful to have all of my YouTube subscribers and Blog followers! Thank you for your continued support.
As a reminder, here is what you needed to do to enter the giveaway…
To enter the drawing:
Tell me what fruit I mention in my “ABOUT” page on this blog. Post your answer in the comments.
On my YouTube channel for this giveaway, tell me which prize package you would like to win.
Entries must be submitted by Sunday, May 9, 2021, Midnight (Pacific Time)
Winners will be selected at random, and will be announced on Friday, May 21, 2021
And now, here are the winners (chosen at random)…
Tim Holtz Die Set: Celeste Wicmandy
Memories Album: Rebecca Creates
Graphic45 Set: Deborah Cox
Congratulations to you all!
Please email me your contact information (designwishesbypamela@gmail.com), to receive your prize.
Thank you again, and please continue to follow me on this blog, my YouTube channel, and social media.