Just a quick post and tutorial for my latest design project!
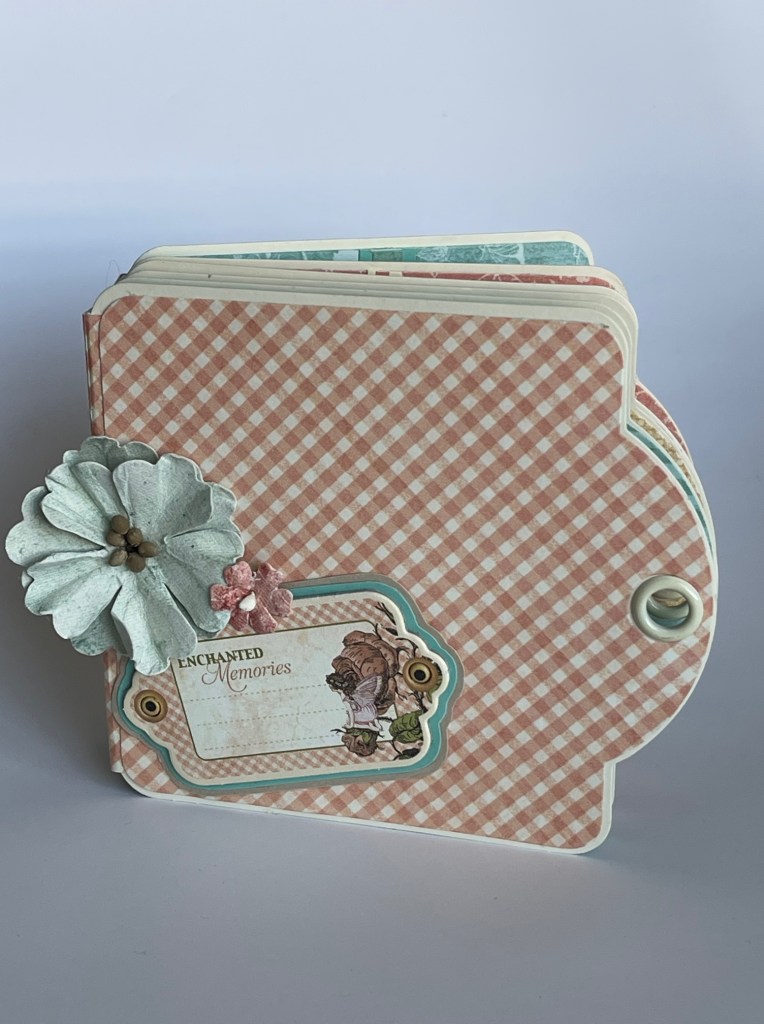
For this project, I used a Graphic 45 Square Ivory Tag Album.
In the tutorial, I show you how to put the album together and provide design inspiration. No dialog in the tutorial, just written instruction prompts and lots of photos to help you follow along as you create your tag mini album.
Super excited to be back! Thank you so much for staying with me!
I am so happy to bring to you my Graphic 45 Brand Ambassador Call 2021 project submission!
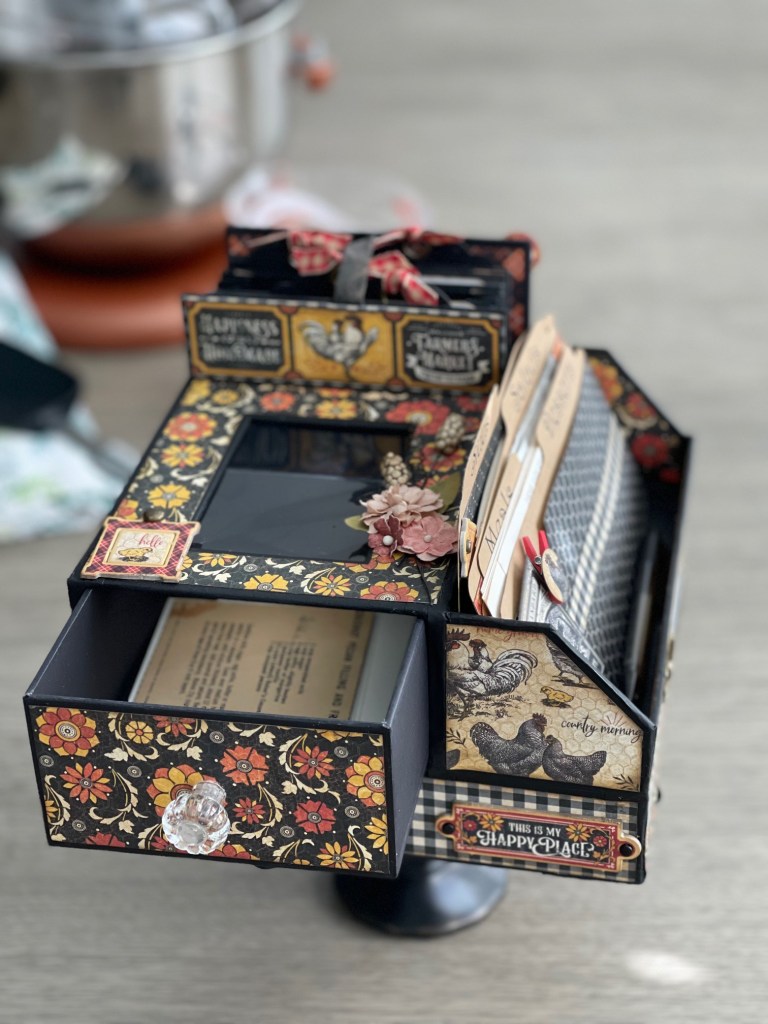
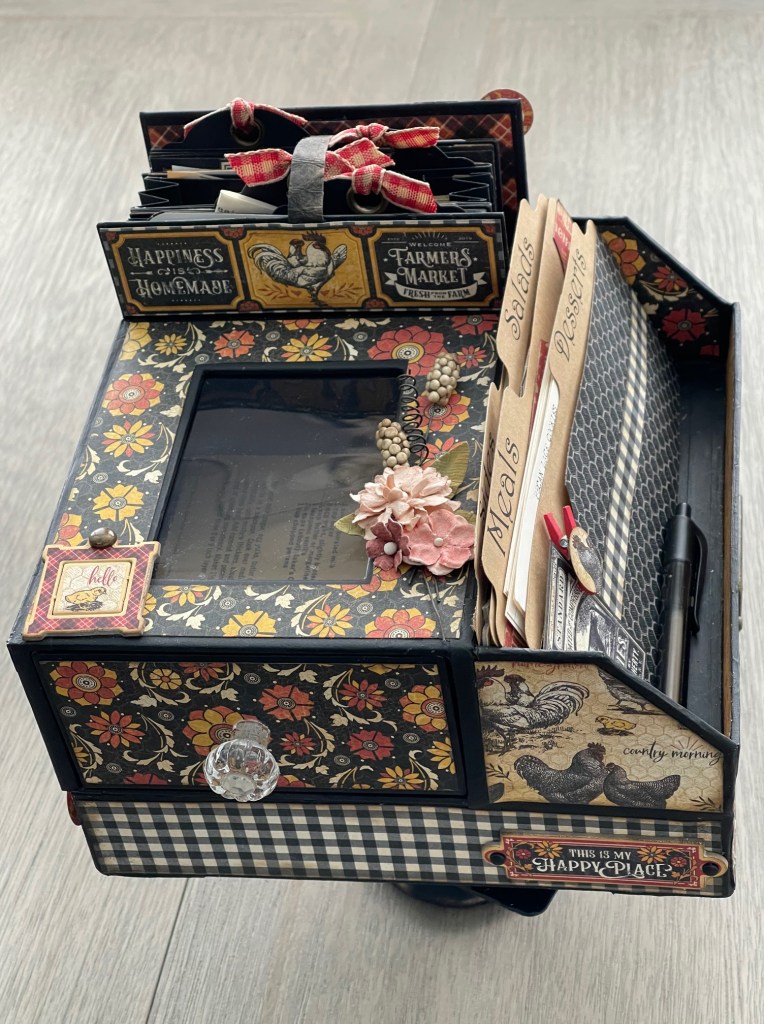
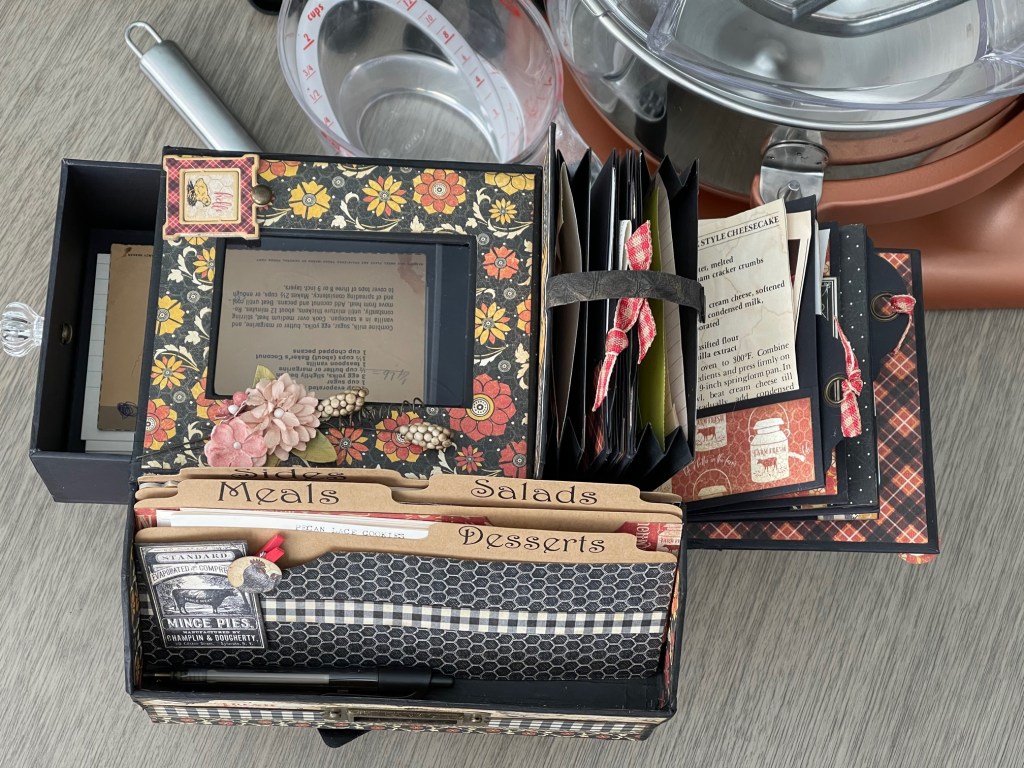
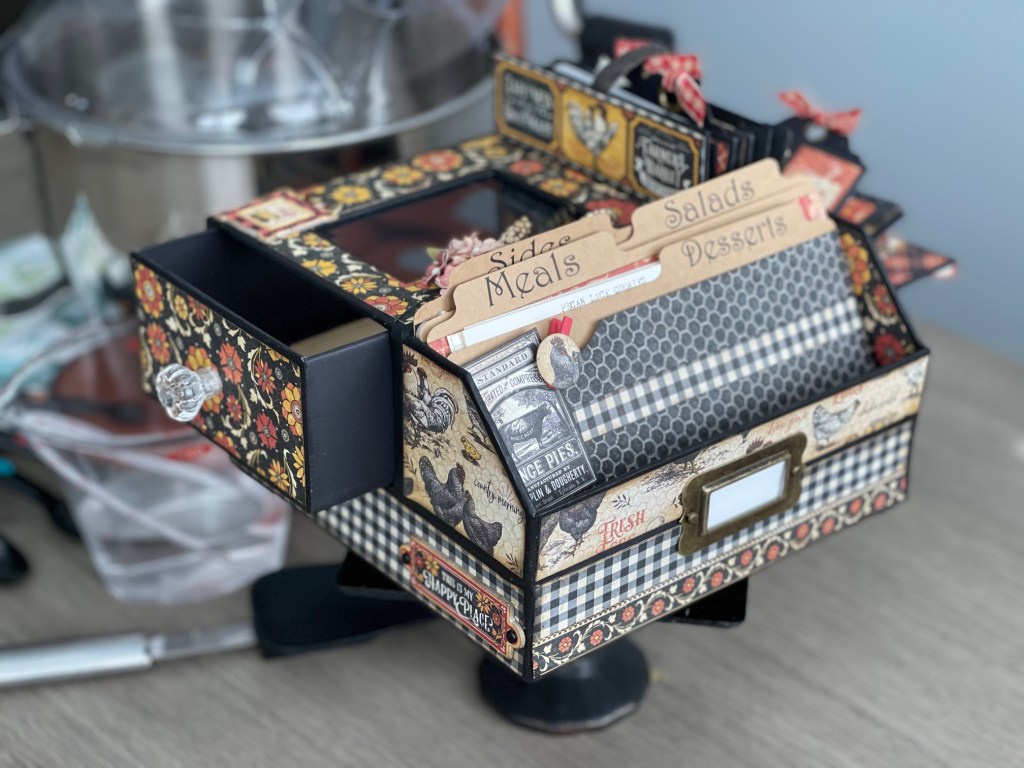
For this project, I chose the “Farmhouse” paper collection from Graphic 45. I used the 8″ X 8″ paper pad and chipboard elements from the collection.
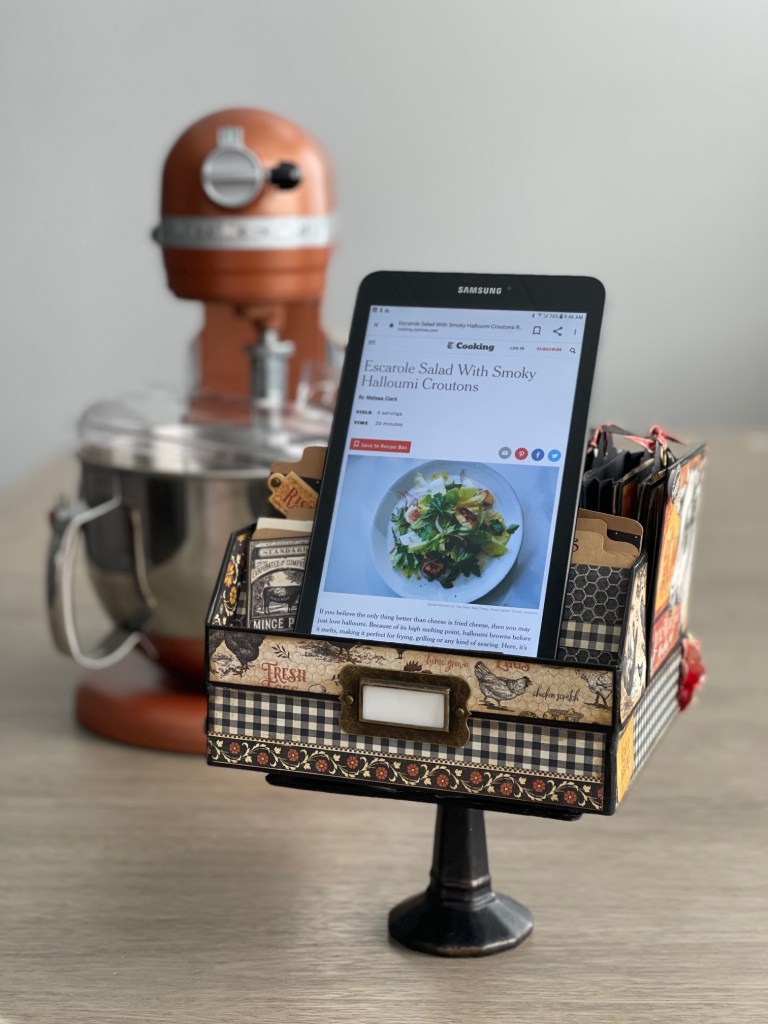
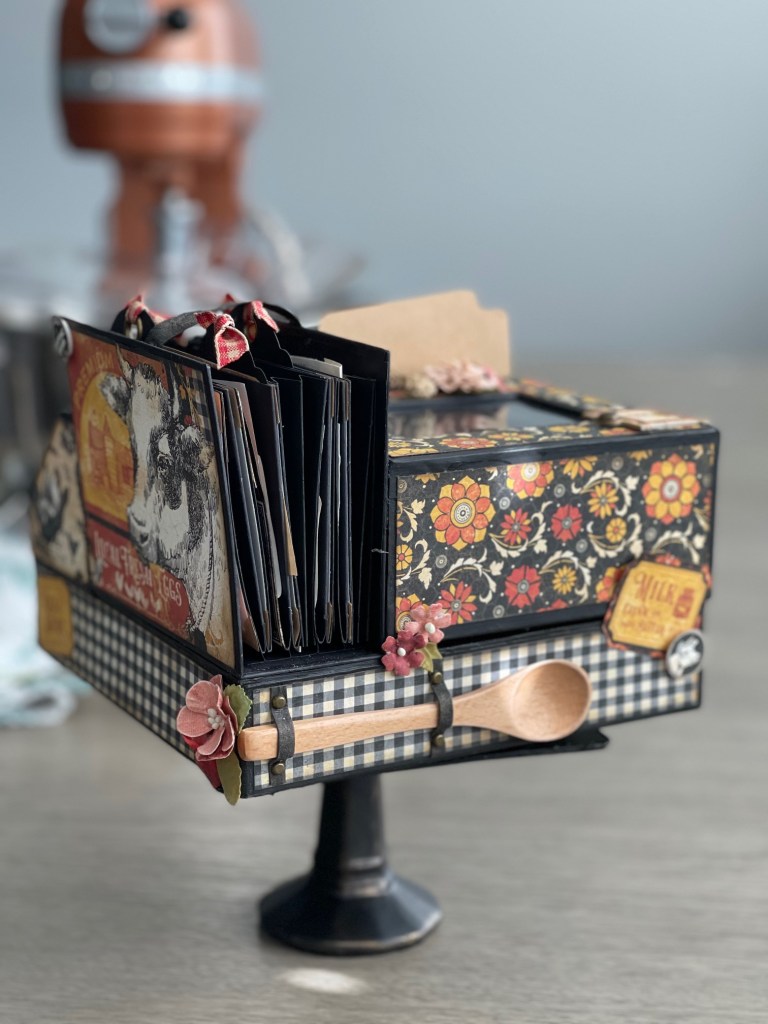
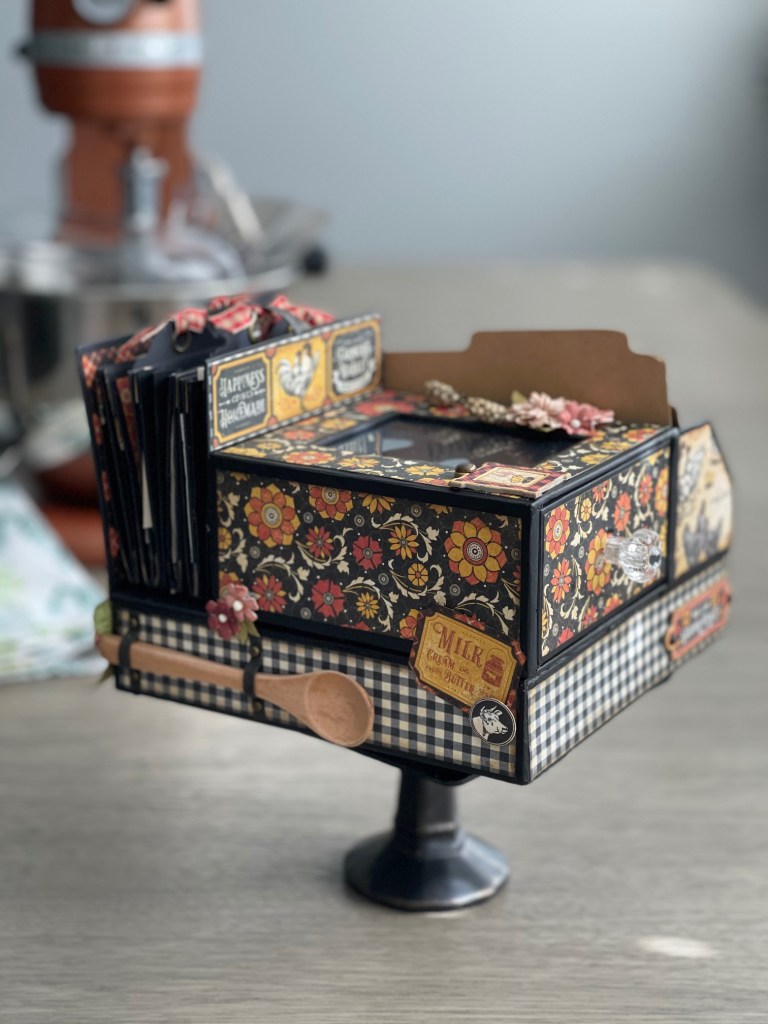
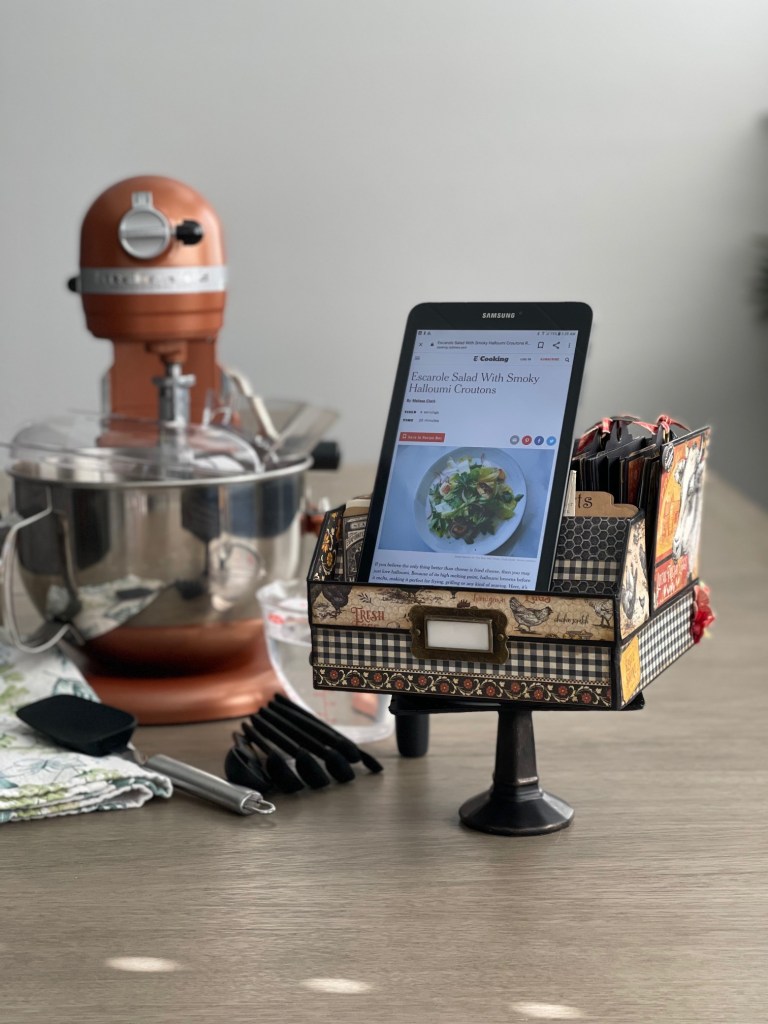
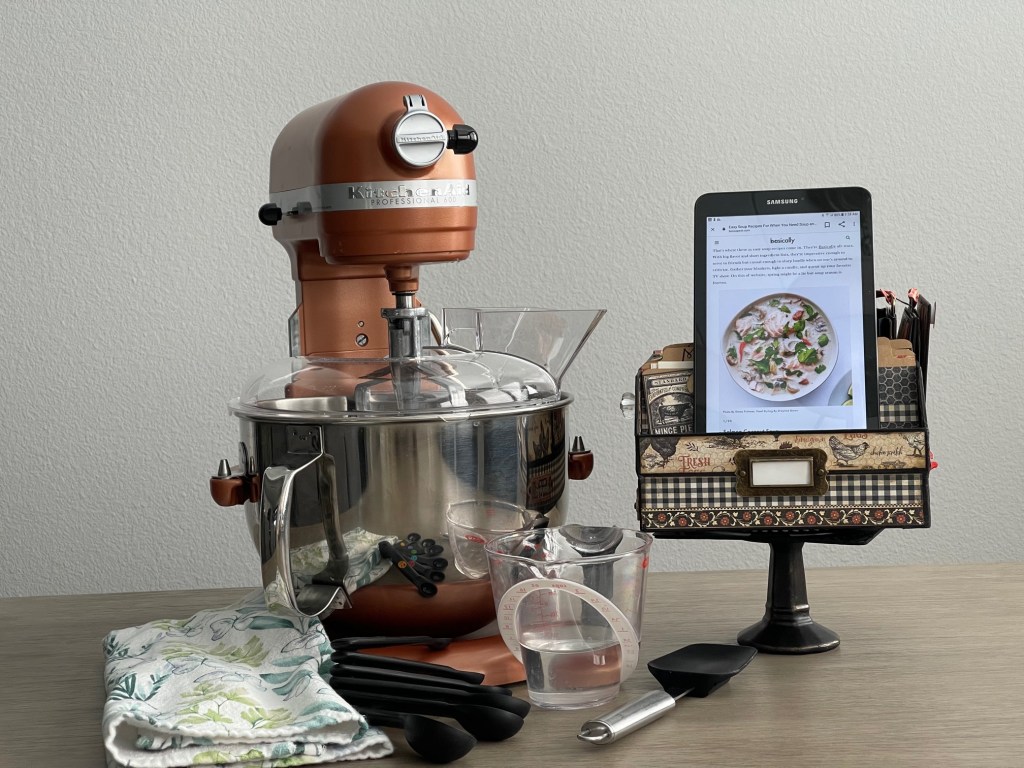
I am calling this design project a “Rotating Recipe Center”.
There are so many cute and whimsical elements incorporated in the design. A mini spoon and actual vintage recipes from my own recipe collection. I also used Graphic 45 ATC Tag & Pocket Album as well as the ATC Matchbook Box, both in black.
I like the idea of using products and staples in different creative ways. You can see that I used the ATC Tag & Pocket Album in a non-traditional way, or a way you would not ordinarily use this product. I like thinking outside the box when designing, and Graphic 45 provides great staples in their collections that lend to this type of creative style.
So, what if you don’t have any recipe cards, all of your recipes are online? Not to worry, this Rotating Recipe Center is strong and sturdy enough to hold a mini iPad or tablet! which makes it a convenient holder for your device.
Below is a slideshow of photos and the tutorial for this project. You can also find it on my YouTube channel!
I will be posting more design projects and ideas soon.
Thank you for following me on my blog and other social media!
I hope you all are doing well and staying COVID safe!
Just a brief update…
As my “About” page states, life can give you lemons from time-to-time and that is when you need to make some lemonade. 😉 That is where I am at right now. It doesn’t mean I’m not creating and designing, I am. Just need to take a break from posting for a short while.
I hope you continue to following me and this blog, as well as my Facebook, YouTube, and Instagram accounts. If you are just joining me on my blog, “THANK YOU” and “WELCOME”, and in the meantime, take a look at my posts and videos.
So happy to bring you my first design project for 2021!
For this project, I used the gorgeous paper collection and sticker set “Lost in Paradise” from Graphic 45.
Some design elements include an inlay center piece in the front of the box, unique box opening, hinge closure, large photo display for photos, and metal “rivot” heads on hinges.
This uniquely designed boxed album set makes an attractive display for your album collection or photo library.
You can see a list of some of the primary products I used for this project design in the YouTube description box and below.
Thank you so much for stopping by. I hope you are inspired to created your own boxed mini album.
List of some of the products I used in this project.